With a 67% rise in digital fraud and document tampering, validating eSign online is no longer optional – it’s a must-have competitive edge. From customer onboarding to vendor contracts and legal agreements, every e-signed document requires verification for authenticity, integrity, and legal compliance.
That’s why over 3,000 leading enterprises trust SignDesk to power their eSign workflows. Giving compliance teams, legal heads, and CXOs the assurance they need, in just a few clicks.
In this step-by-step guide, we’ll explore how to validate eSign online quickly, accurately, and securely – so your business stays compliant, protected, and ahead.
What is eSign Validation?
eSign validation is the process of checking whether a digital or electronic signature on a document is:
- Authentic (signed by the right person),
- Intact (not tampered with after signing),
- Legally valid (compliant with the Indian IT Act 2000, and global standards).
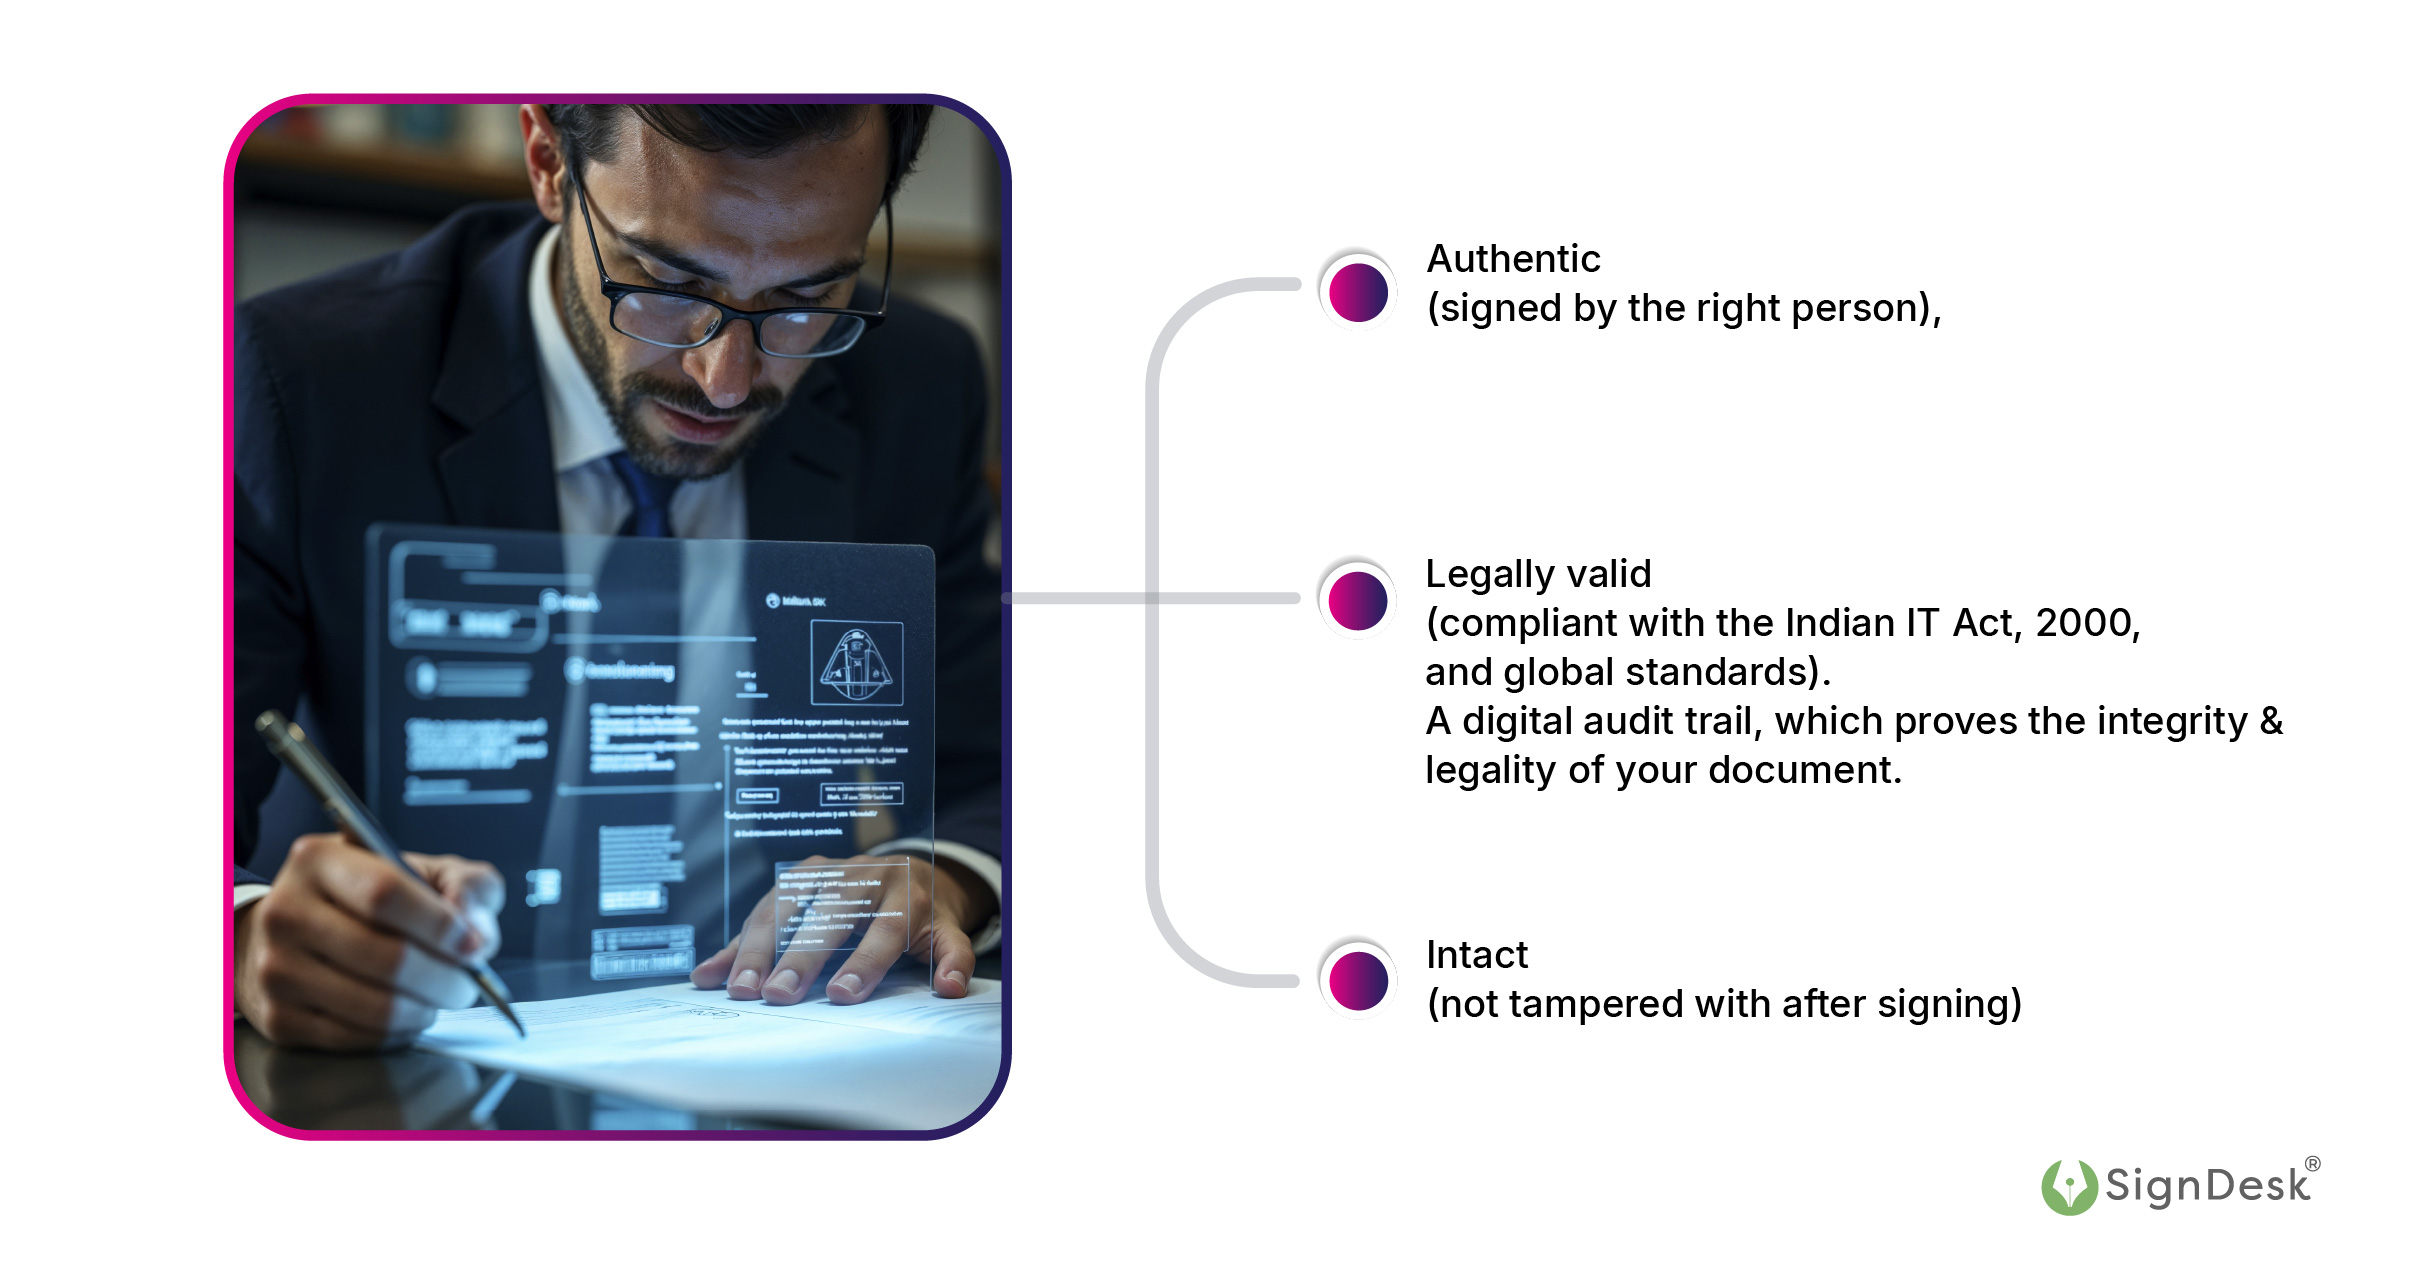
A digital audit trail, which proves the integrity and legality of your document.
Step-by-Step: How to Validate eSign Online in a PDF for 100% Legal Compliance
To validate eSign, you must follow these steps:
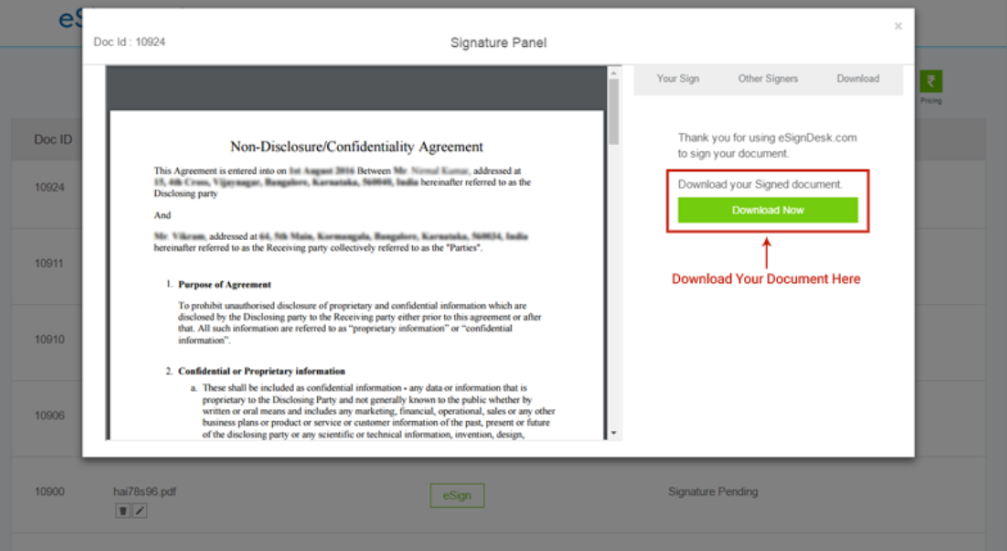
Step 1: Open the Signed PDF
Use a trusted PDF viewer, such as Adobe Acrobat Reader, to open the document containing the e-signature.
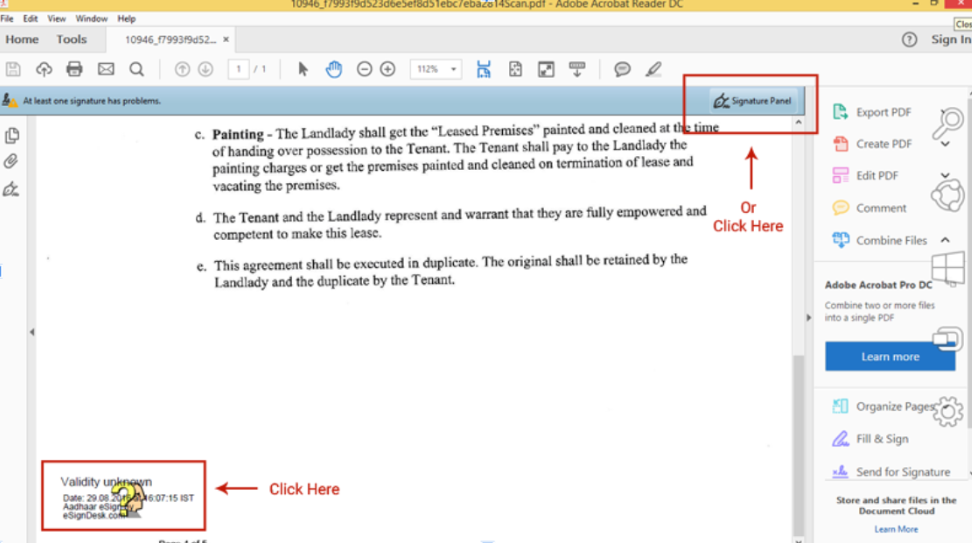
Step 2: Look for Signature Panel
Once the file opens:
- A blue ribbon or green checkmark will typically appear at the top, indicating that “Signed and all signatures are valid.”
- Alternatively, click on “Signature Panel” to see more information about the signer.
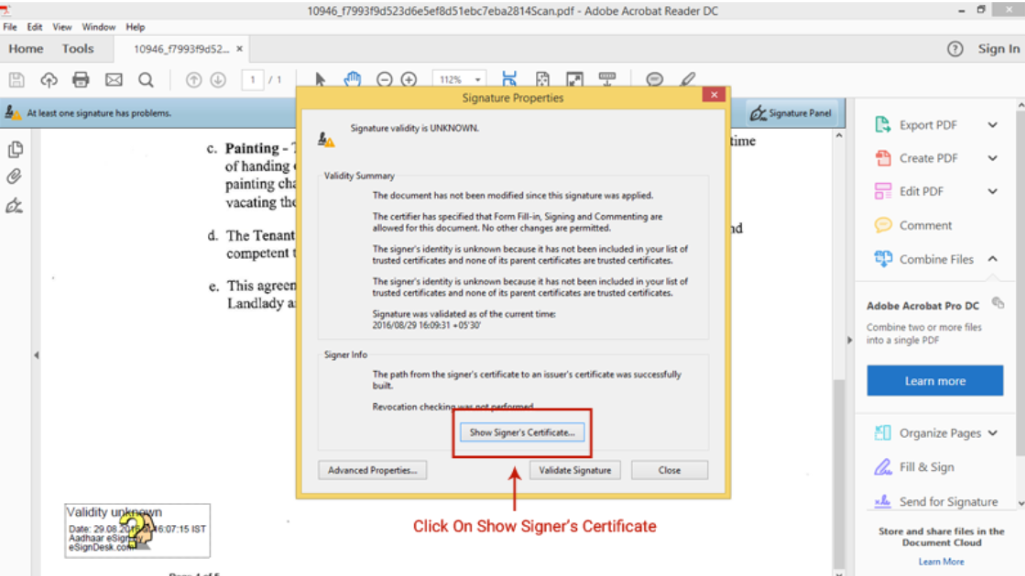
Step 3: Check Signature Properties
Click on the signature and select “Signature Properties”:
- View the signer’s name and organization.
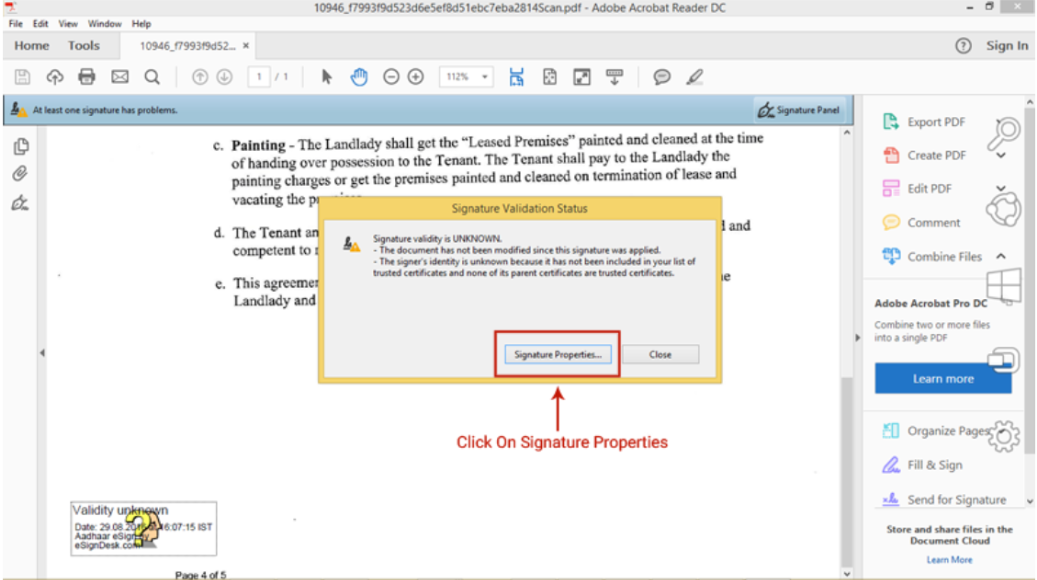
- Verify certificate details (issued by CCA in India for DSCs).
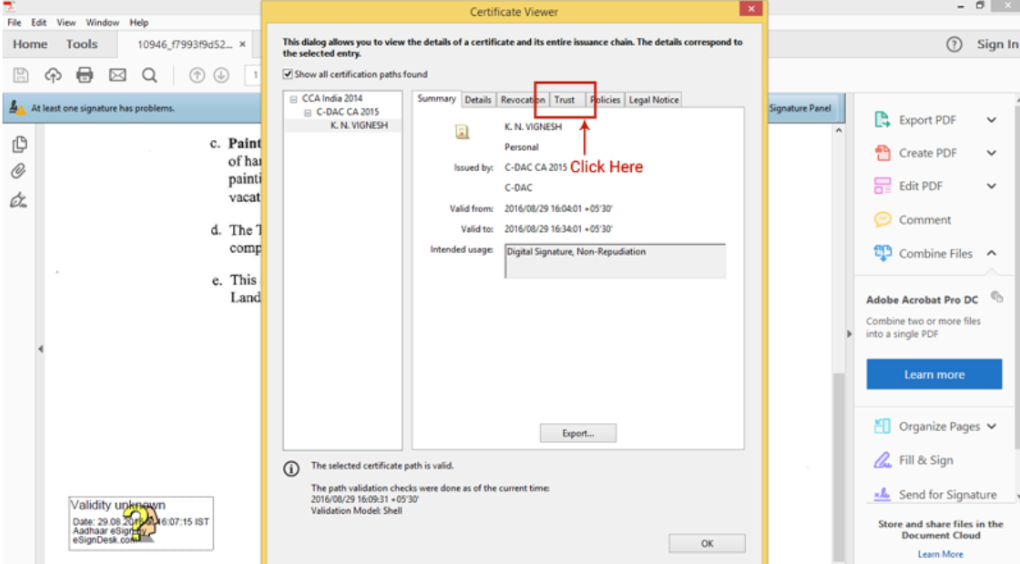
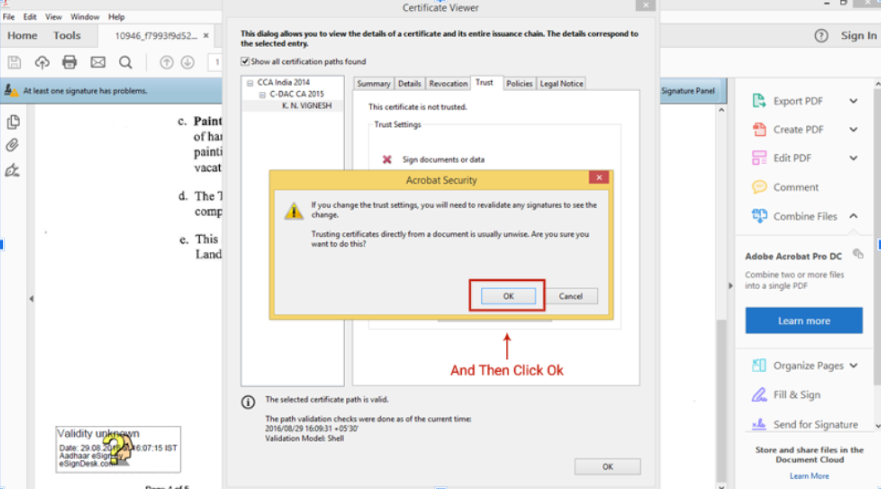
- In the ‘Certificate Viewer’ window, click the tab named ‘Trust’.
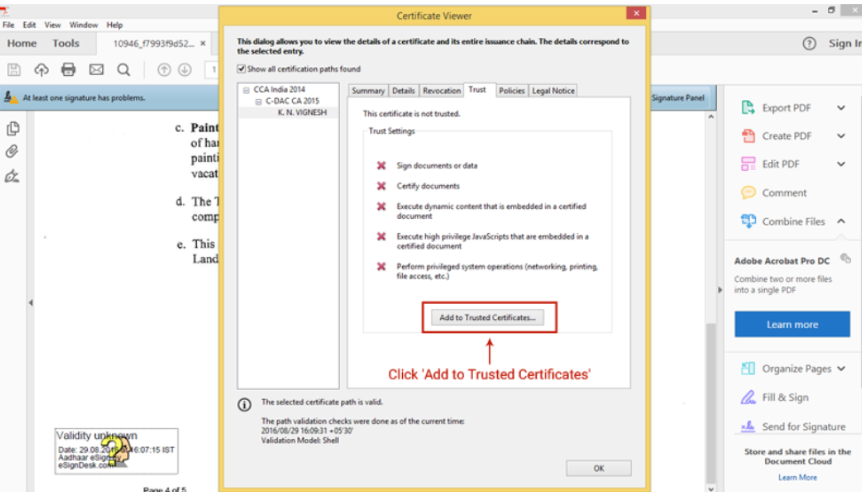
- Click ‘Add to Trusted Certificates’. Click ‘OK’ in the pop-up that follows.
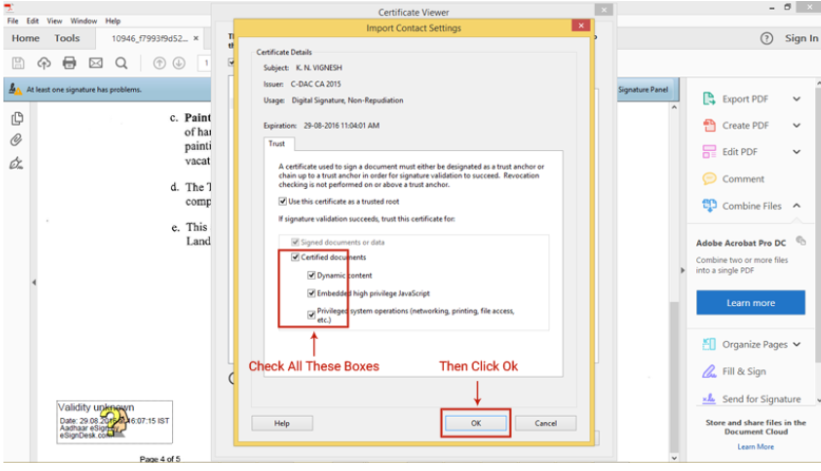
- You will be redirected to the ‘Import Contact Settings’ window. Check (Tick) the boxes provided before Certified documents and the three other options that follow. Then click ‘OK’ to continue.
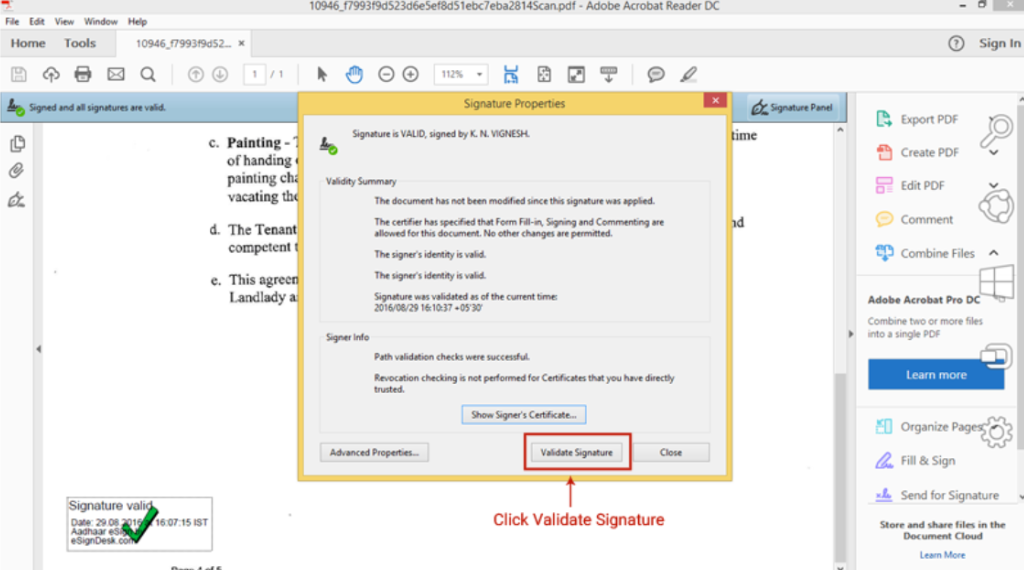
- Click ‘Validate Signature‘ in the Signature Properties window. And then click ‘Close‘.
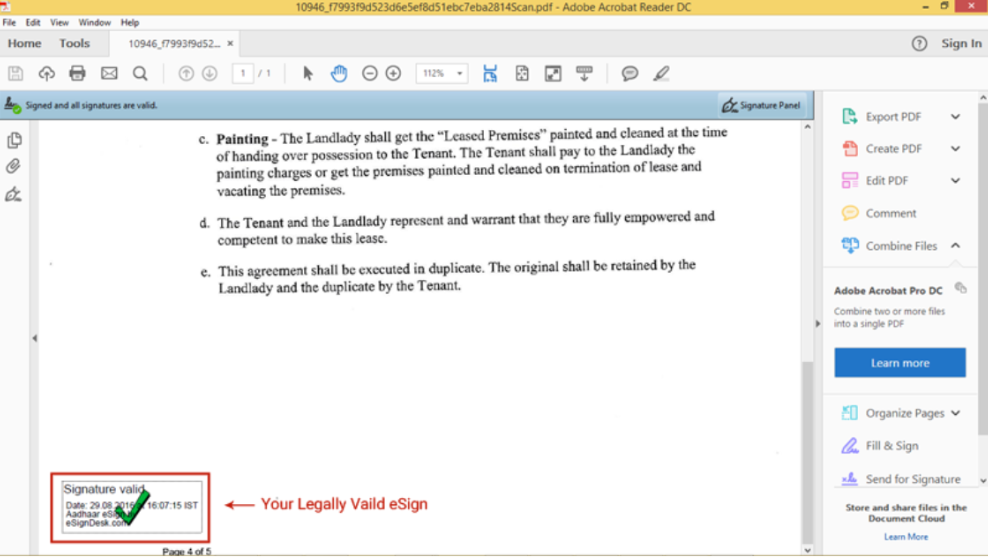
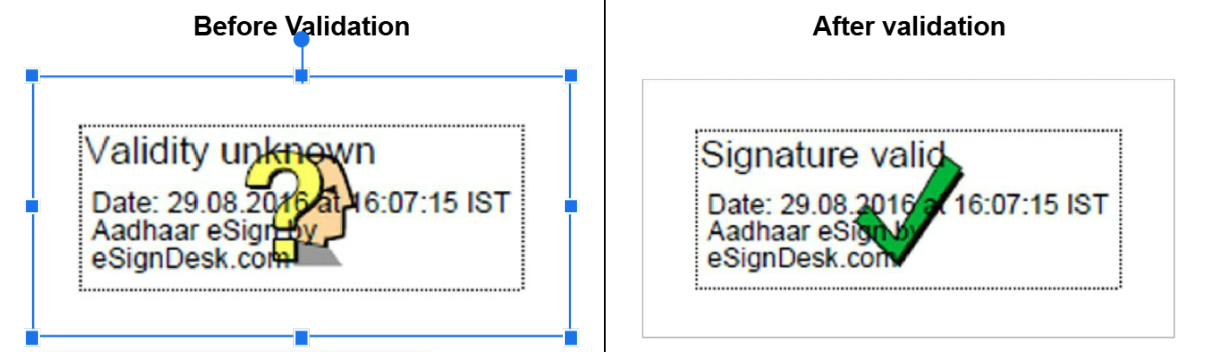
- Now your eSign is complete. Your eSign will have a green-colored Tick mark, which means it is validated.
Step 4: Validate Certificate Trust Chain
Ensure that the digital certificate is:
- Issued by a licensed Certifying Authority (like eMudhra, Capricorn, etc.).
- Valid and not expired.
- Not revoked or tampered with.
|
Who Should Care About eSign Validation?
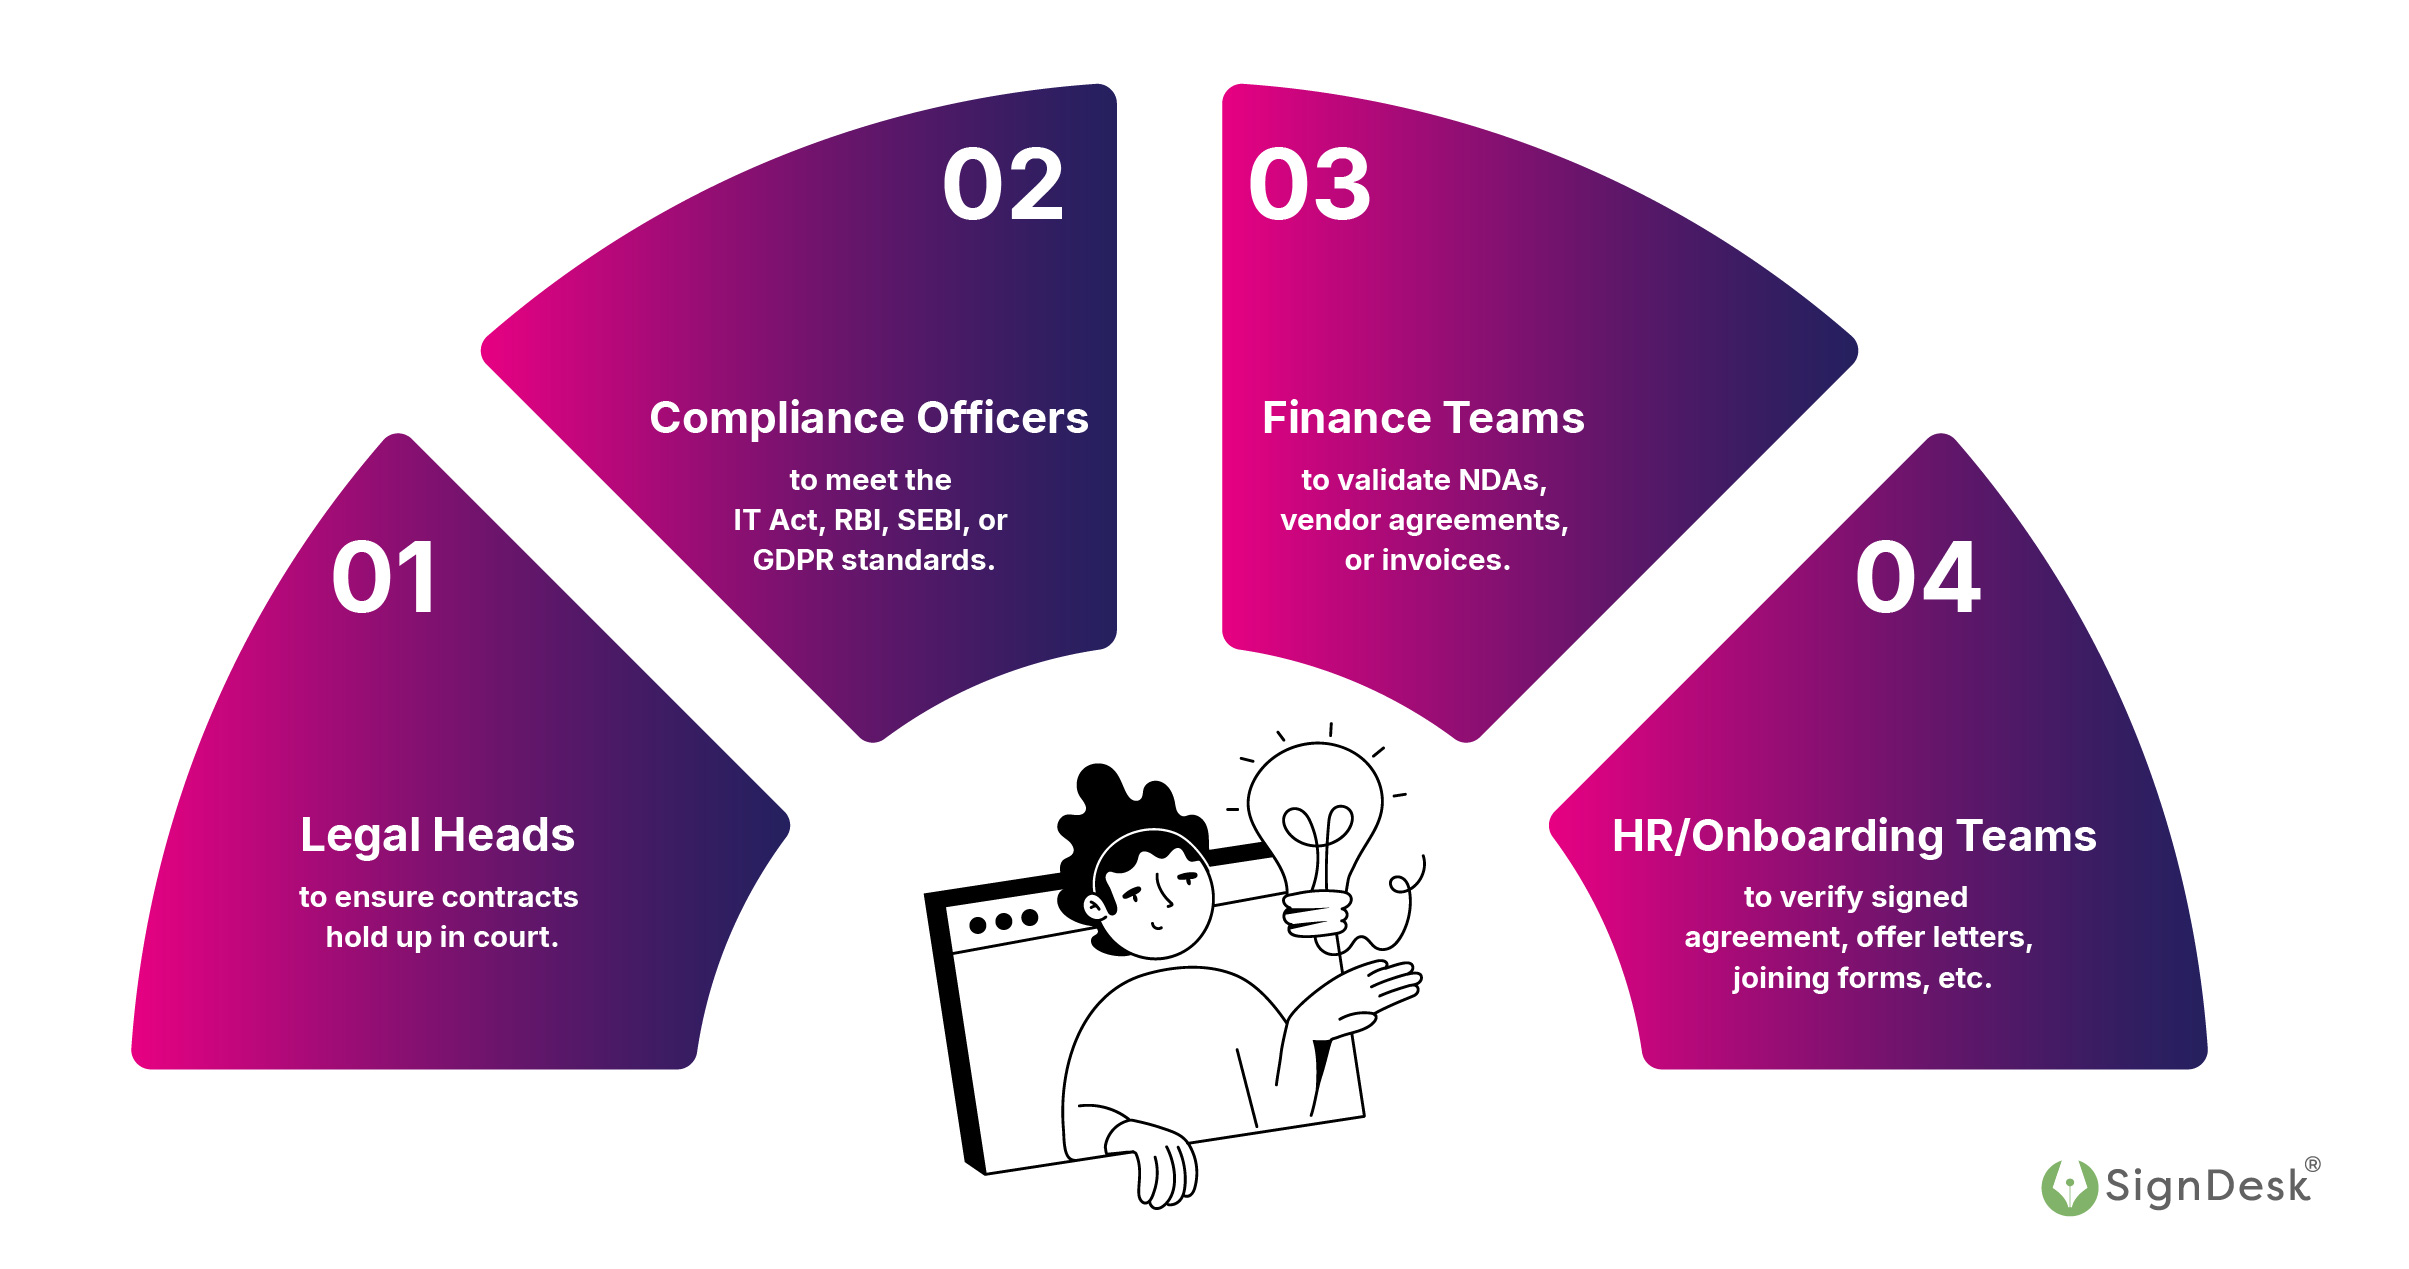
If you’re in any of the following roles, validating eSigns should be your daily hygiene:
- Legal Heads to ensure contracts hold up in court.
- Compliance Officers to meet the IT Act, RBI, SEBI, or GDPR standards.
- Finance Teams to validate NDAs, vendor agreements, or invoices.
- HR/Onboarding Teams to verify signed agreement, offer letters, joining forms, etc.
|
3 Major Reasons Why eSign Validation Online Matters More Than Ever
It’s 2025, and more than 83% of businesses have adopted e-signatures, considering them a more secure option. From loan approvals and NDAs to procurement deals and patient records, eSignatures are everywhere.
But here’s the catch – when documents are sent without proper signature validation, millions of contracts are potentially at risk, not only legally, but financially.
Protection Against Fraud & Tampering
Unverified eSign open the door to forgery, manipulation, and unauthorized edits. In sectors that handle sensitive data, such as banking, insurance, and healthcare, it’s a serious security lapse.
When contracts can’t be validated:
- They may not hold up in court
- Audit teams face compliance red flags
- Businesses expose themselves to reputational and financial damage
|
Ensuring Legal Enforceability
Under the Information Technology Act, 2000, and global e-signature laws (such as eIDAS in the EU), only digitally verified signatures are legally binding. Without proper validation, even a digitally signed document may fail legal scrutiny.
In regulated industries such as BFSI, legal, and healthcare, unverifiable eSignatures can lead to contract disputes, compliance penalties, and other issues, resulting in an annual revenue loss of up to 9%.
|
Compliance & Audit Readiness
For CXOs, legal heads, and compliance officers, eSignature validation is not optional – it’s mission-critical. A validated signature ensures:
- The signer’s identity is verified
- The document is tamper-proof
- An audit trail is in place
- The contract is admissible in court
|
Validated eSignatures create trust – not just between you and your customer, but across internal teams, regulators, and stakeholders. Yet, it is common for people to make mistakes.
Common Errors in Signature Validation (And How to Fix Them)
Below are three common eSigned document validation issues professionals encounter – and how you can fix them without losing time or trust.
1. Signature Not Verified
What it means: This typically occurs when you open an eSigned document in an outdated or incompatible version of PDF software (like Adobe Reader). The tool fails to recognize or validate the signature algorithm.
How to fix it:
- Update your Adobe Acrobat Reader to the latest version from the official site.
- Reopen the document, and click the “Signature Panel” to refresh validation.
- If needed, manually trust the signer’s certificate.
|
🔍Insight: According to a security research report, 56.46% of enterprise users running Adobe have an outdated version installed, resulting in more validation errors than necessary.
|
2. Unknown Issuer
What it means: The signer’s certificate isn’t linked to a recognized Certificate Authority (CA), or your system doesn’t trust the issuing authority by default. This breaks the trust chain.
How to fix it:
- Click on the signature → “Signature Properties” → “Show Signer’s Certificate”
- Go to the “Trust” tab → Click “Add to Trusted Certificates”
- Tick all boxes (certified documents, identity, and dynamic content), then hit OK
|
🔍Pro Tip: Always ensure the certificate is issued by a valid CA licensed under India’s Controller of Certifying Authorities (CCA).
|
3. Revoked or Expired Certificate
What it means: The signer’s digital certificate was either revoked (invalidated before expiry) or has crossed its validity period. These certificates cannot be validated unless they are replaced.
How to fix it:
✅ Reach out to the document issuer and request a new version signed with an active certificate.
✅ For internal workflows, revoke the old signing request and initiate a fresh eSign process.
|
🔍Reality Check: Digital certificates typically last between 1 and 2 years. Failure to monitor certificate validity can lead to rework, delays, and compliance penalties, particularly in regulated sectors such as BFSI and legal.
|
By proactively managing signature validation, you protect your organization’s credibility, timelines, and legal enforceability.
|
Key Benefits of Validating eSignatures: Peace of Mind & Performance
|
|
Speed up deal closures
|
Reduce legal risks
|
Ensure clean audits
|
Clean brand integrity
|
Don’t leave your contracts to chance! Let SignDesk help you seal every deal – eSign securely and quickly.
SignDesk’s Compliant eSign Platform: One-Click Confidence
Long turnaround times, rising operational costs, and mounting compliance risks are everyday hurdles – that’s where SignDesk eSign makes all the difference. We offer quick and secure e-signing, allowing you to validate it even more quickly.
SignDesk eSign: Verified, Secure, Instant e-Signing
SignDesk’s eSign platform empowers enterprises to sign, share, and store legally valid documents digitally. The platform is fully compliant with Indian regulations like the IT Act, UIDAI guidelines, and CCA standards.
✅Aadhaar-based eSign: Easily authenticate signers with OTP-based or biometric Aadhaar verification.
✅ AI-Enabled Verification: Enhance signer identity assurance using geofencing, liveness detection, and AI-powered face match. It’s ideal for high-value or sensitive agreements.
✅Digital Signature Certificates (DSC): Offer high-assurance signing using DSC-based signatures, best-suited for legal, financial, and regulatory documentation.
✅ Fully API-Enabled & Scalable: Integrate seamlessly into your workflows with enterprise-grade APIs, audit trails, and multi-party signing features. Scale confidently as your operations grow.
Real Impact, Real Outcomes: Fyers’ Success Story
Take Fyers, a leading name in India’s fintech space.
They faced rising pressure from customers due to the slow and manual processing of paperwork, especially during high-volume periods. SignDesk stepped in with a customized eSign solution, designed to handle bulk signing with speed and precision.
The results?
✅Turnaround time (TAT) dropped from days to just a few hours
✅Over 1,000 eSigns processed daily, effortlessly
✅Happier customers and increased onboarding rates
Fyers didn’t just fix a broken process – they scaled faster and delivered better experiences.
Trusted by 3,000+ Businesses for a Reason
SignDesk is the go-to partner for industry leaders across finance, legal, HR, and procurement. Here’s how we help teams like yours:
|
68% reduction in TAT: Get documents signed instantly, not after days of follow-ups.
Process 45 M+ documents/year: Empower remote teams to operate anywhere, anytime.
100% paperless = significant cost savings: No more printing, couriering, or scanning.
Scalable to 48,000+ signs/month: Our platform grows with your business.
|
What does this mean for you? Quick eSigning and faster validation = Frictionless contract closures! Most importantly, faster, more innovative customer experiences.
|
Ready to see what SignDesk can do for your business? Join thousands of forward-thinking companies.
Transform 1.6x faster with SignDesk eSign
|